Okay, folks, let’s talk about my recent adventure with a tri-tip and my trusty cast iron skillet. I’ve been seeing these beautiful cuts of beef at the store, and I finally decided to give it a shot.
I started by grabbing a decent-sized tri-tip, around 2.5 pounds. I wanted something with good marbling, you know, those nice streaks of fat that make everything juicy and delicious. I’m no expert butcher, so I just eyeballed it, picking one that looked “good” to my untrained eye.
Next up: the seasoning. Now, I’m a simple guy. I believe in letting the meat speak for itself. So, I went with a generous amount of coarse salt and freshly cracked black pepper. Don’t be shy with it! I literally coated that thing. Rub it in good, make sure every inch is covered.
Getting the Cast Iron Ready
My cast iron skillet is my baby. I’ve had it for years, and it’s seen it all. Before I even thought about putting the meat in, I got it screaming hot. I mean, really hot. I put it on medium-high heat and let it sit there for a good 5-7 minutes. You want it to be almost smoking.
Then, I added a little bit of oil – I used some simple vegetable oil, just enough to coat the bottom of the pan. You don’t need a lot, just a thin layer. The key is the HOT pan.
Sear That Tri-Tip!
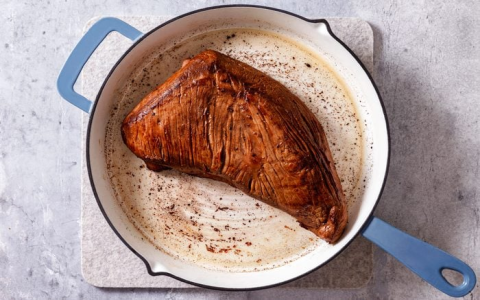
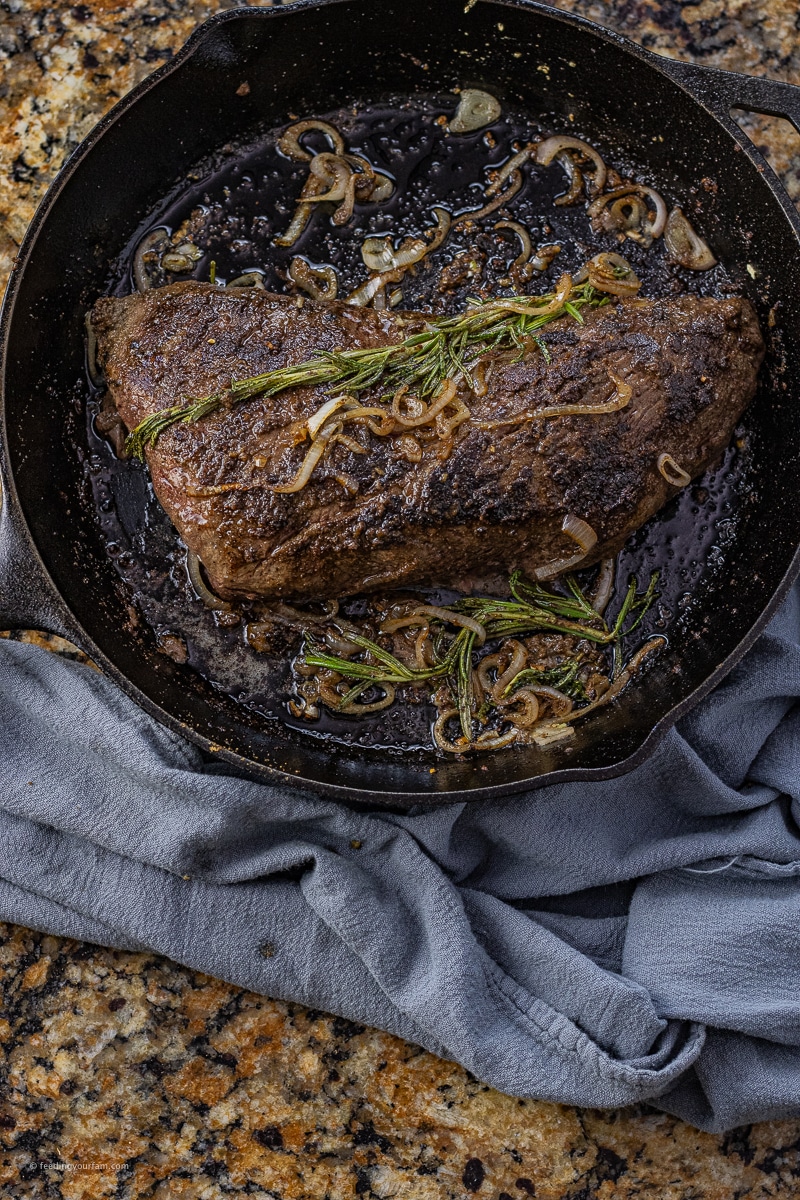
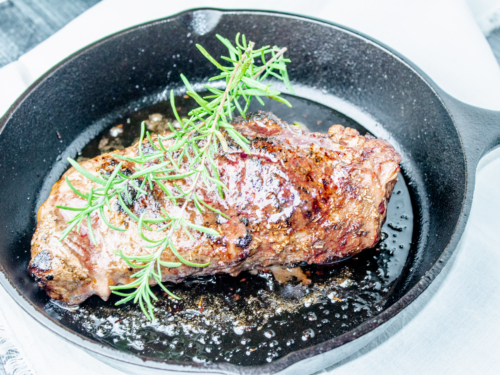
Once the oil was shimmering, I carefully placed the tri-tip in the skillet, fat-side down first. That sizzle is music to my ears! I seared it for about 4-5 minutes on that side, without moving it. Don’t poke it, don’t prod it, just let it do its thing. The goal is to get a nice, deep brown crust.
After that, I flipped it over and seared the other side for another 4-5 minutes. Again, no touching! We’re building flavor here, people!
Oven Time
Once both sides were beautifully seared, it was time for the oven. I preheated my oven to 400°F (200°C). I put the whole skillet, tri-tip and all, directly into the oven. I didn’t add any liquid, just the meat and the skillet.
Now, the cooking time depends on how you like your steak. I like mine medium-rare, so I aimed for an internal temperature of around 130-135°F (54-57°C). I used a meat thermometer to check it – best kitchen investment ever! It took about 20-25 minutes in the oven, but your mileage may vary. So always use temperature as final checking result.
Rest and Slice
Once the tri-tip reached the desired temperature, I took it out of the oven and let it rest on a cutting board for at least 10 minutes. This is crucial! Don’t skip this step. It allows the juices to redistribute, resulting in a much more tender and flavorful steak.
- Resting is very important!!
Finally, the moment of truth: slicing. Tri-tip has a tricky grain, so you need to pay attention. Look closely at the meat, and you’ll see the direction of the muscle fibers. You want to slice against the grain. This makes the meat much easier to chew.
And that’s it! My first attempt at tri-tip in a cast iron skillet. It wasn’t perfect, but it was damn good. The crust was amazing, the inside was juicy, and the flavor was on point. I served it with some roasted vegetables, and it was a perfect meal. Will I do it again? Absolutely!


Post Comment