Alright, let’s talk about making some strawberry rhubarb jam. I’m no expert, but I love trying out new things in the kitchen, and this one turned out pretty good, so I figured I’d share my experience.
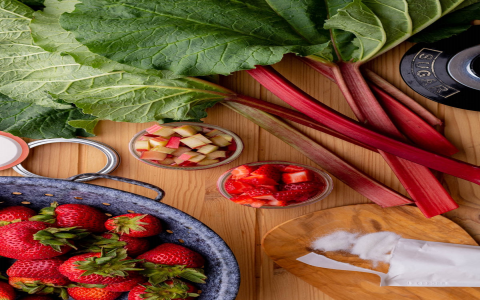
First off, I gathered all my ingredients. I picked up some fresh strawberries and rhubarb from the local market. They looked so vibrant and juicy! Then, I made sure I had enough sugar on hand. For this recipe, I also needed Sure-Jell, which is basically pectin that helps the jam set. And of course, I grabbed some jars and lids to store the jam in later.
Next, I got down to prepping the fruit. I washed the strawberries and rhubarb thoroughly and chopped them into small pieces. It was a bit of a messy process, but seeing all those colors come together was already making me excited.

- Washed the fruits
- Chopped them up
- Admired the pretty colors
Once the fruit was ready, I dumped it into a big pot. I added in the sugar, gave it a good stir, and then let it sit for a while. This helps draw out the juices from the fruit, which is important for getting a good jam consistency. I remembered reading somewhere that you should let it sit for about 10 minutes, but I probably let it go a little longer because I got distracted by a phone call.
Stirring and Simmering
After the fruit had macerated, I put the pot on the stove over medium heat. I stirred it constantly to make sure the sugar dissolved completely. This took a few minutes, and I made sure not to let it boil too hard. Once the sugar was all melted, I mixed in the Sure-Jell. It’s important to stir it in really well to avoid any clumps.
Then came the waiting game. I let the mixture simmer, stirring occasionally, until it started to thicken. The package says to boil for exactly 1 minute after it reaches a full rolling boil, so I used my phone timer to be precise.
Once the timer went off, I took the pot off the heat and carefully ladled the hot jam into my sterilized jars. I left a little bit of space at the top, as you’re supposed to. Then, I wiped the rims of the jars, put on the lids and rings, and tightened them just enough.
I processed the jars in a boiling water bath for about 10 minutes. I know some people skip this step for freezer jam, but I wanted to be extra safe since I was planning to store some of it in the pantry. After the bath I took them out and set them to cool on the counter.
The hardest part was waiting for the jam to cool and set. I kept checking on it every few hours, and finally, after a full day, it was perfectly set! The color was a beautiful deep red, and the taste? Oh man, it was the perfect balance of sweet and tart. I immediately spread some on a piece of toast, and it was heavenly.
So, that’s how I made my strawberry rhubarb jam. It was a bit of work, but totally worth it in the end. I ended up with several jars of delicious homemade jam that I can enjoy for months to come. If you’re thinking about trying it, I say go for it! It’s a fun and rewarding experience, and you get to enjoy the fruits of your labor in the most delicious way possible.


Post Comment